
I’m gonna be showing you a DIY waist trainer. So honestly, I’ve been sewing those waist trainers and probably going to put some pictures on the side of me here on Instagram and the cost really like, they’re really expensive. And honestly, I don’t wanna put that much into it.
So what I actually did is before, like a year or two years ago, I bought a waist belt, and honestly, it was really just for slimming and sweating and stuff like that. And it’s been working really well. And since I’ve lost a lot of my belly fat, or I just lost a lot and it’s not fitting me as usual and honestly I have to stretch almost all the way to the back.
So what I thought is why not use that since now I’m like, this waste is double my size. Why not cut it and maybe make it some more likely, you know, with the waist where it’s really snitching the waste. I can put it here. And then it goes all the way here. And I could do even more this is just to show you.
And then what I’m gonna do is actually cut it to the size of my waist and put a zipper. And then I’m going to use this part that I’m going to be cutting to put one on this side and one on the other side, to what I did here is just to wrap the belt around me.
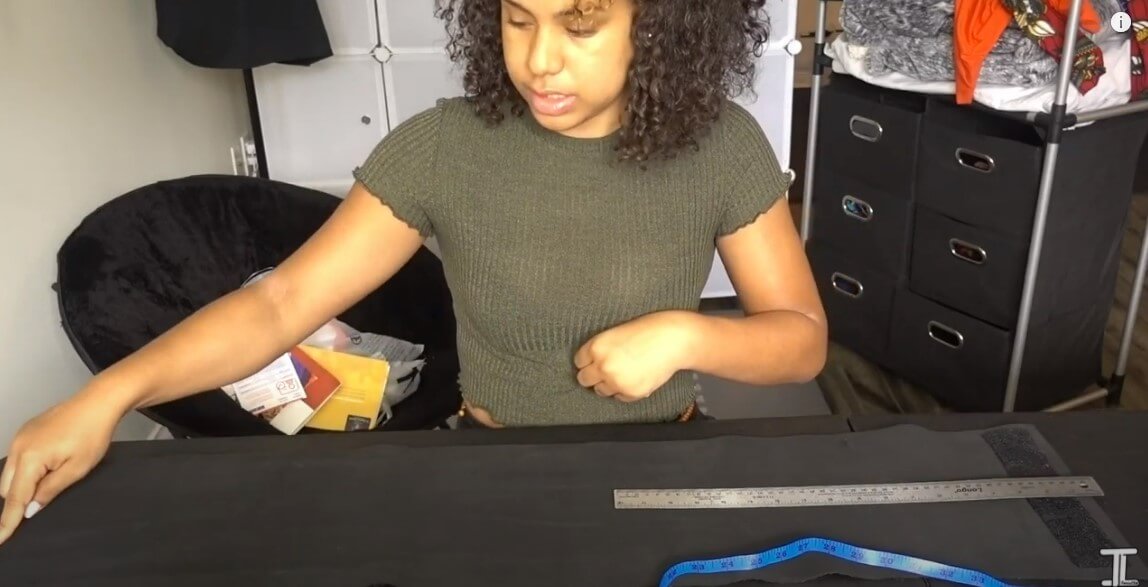
And then I just put this side, the inside where there is no scratch, and make sure that my waist goes around to it. So this is what would my waste be around with this belt. And what I’m gonna do is cut it right around 15 here, because this is the size that was left from the belt. So I’m going to be cutting this and this is going to be used for my strips on the side like I just told you.
And I really recommend that you measure your waist with your belt because the belt extends, and this is gonna help you really have the belt really tight to your belly. This is perfect because it extends and then it’s gonna be here and snatching with the zipper.
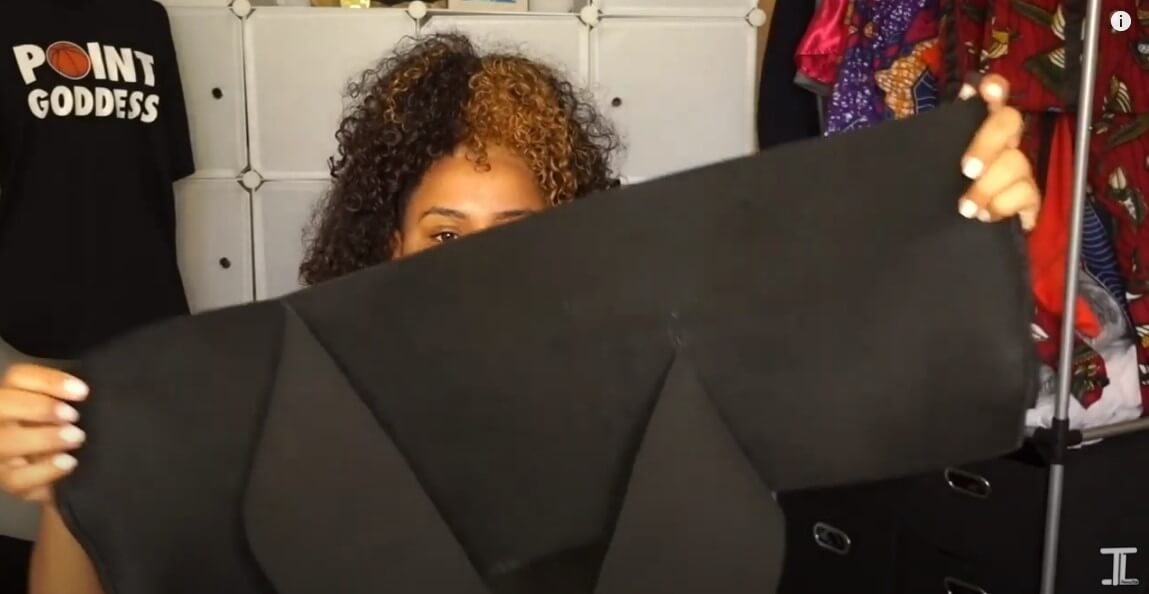
Here I just took an open zipper. I’m gonna be sewing it on each side of them like that. I’m going to be sewing it here, and then be coming back then now as you can see, I have it over here and it’s perfect to my size. And what we’re gonna have to do now is to add the strips around, to go like this.
And because it was a scratch thing, we don’t need to do a lot of work, we just need basically to know where we gonna start this one. And we’re going to have to cut it in half to make sure we have one on this side and one on the other side. So here I did the line.
I don’t know if you can really see, but I did a little line over here and I’m going to be cutting it in half. So here I have both parts and now I’m simply gonna see where I should start it. Should I start from here and come all the way here? Or should I start it? So I think I’m going to start it about here.
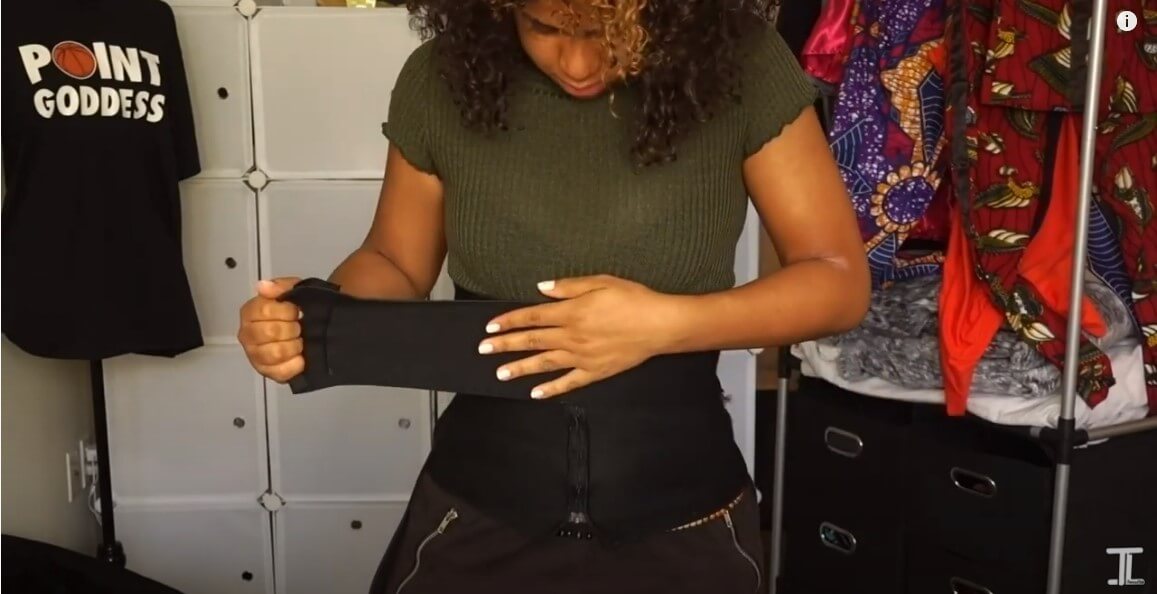
So I’m gonna take your white pen and just really mark it here and I’m going to just sew the side that doesn’t have the scratch over here, and then I’m gonna come back. Okay, Yeah. So now you’re done.
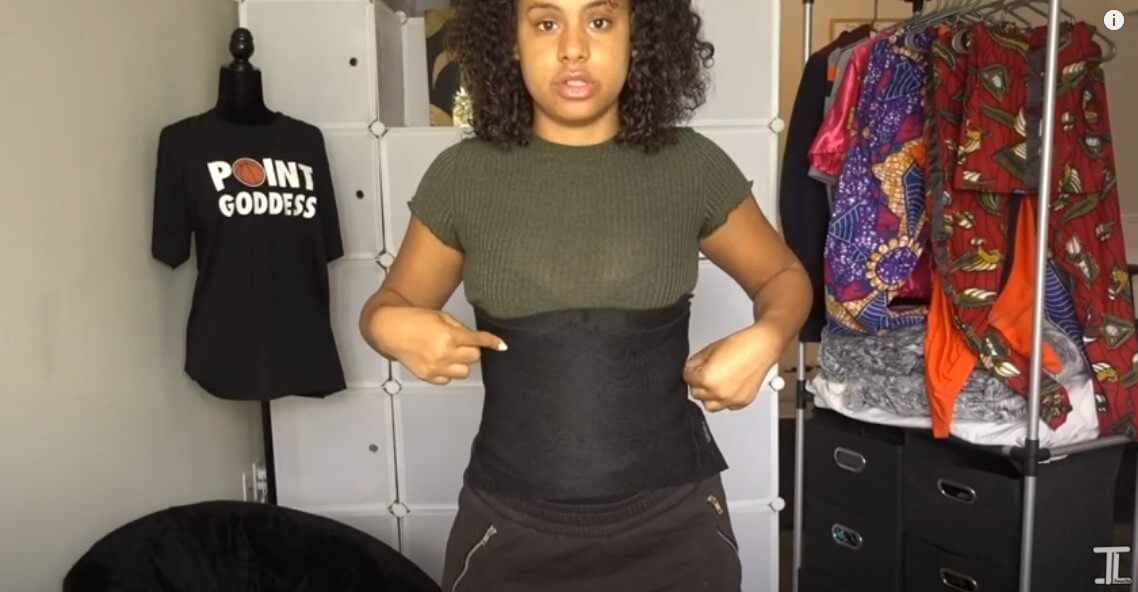
And as you can see, it’s actually like the ones that you see on Instagram and stuff is maybe not the best quality and stuff because I have sewn it myself and for example, there was not the stuff in the back, but this will definitely help you to sweat more and to get really a flat belly when you combine this with a doing exercise, some biking, and everything.
So now I’m just will show you how it does on my body and then after that, I’m gonna be done. And of course, I wanna just cut those tilts, like the extension of the zipper. And so here, all you have to do now is to wrap the sides Really for your lower belly. This is where it puts one on top and one at the bottom.